


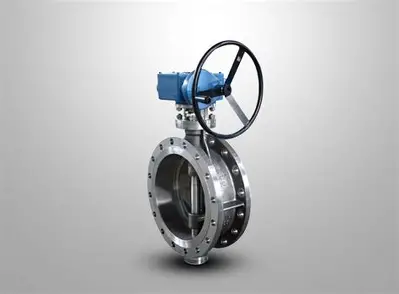


How to Quickly Install and Commission a Butterfly Valve on Site
1. Appearance Inspection and Cleaning
Before installation, start by inspecting the Butterfly Valve carefully. Make sure the valve’s surface has no visible damage, deformation, scratches, or cracks. Check that all labels and markings are clear and legible — this ensures you’re working with the correct model, pressure rating, and material specification. Each connection point, such as flanges or wafer ends, should be firm and free from looseness.
Next, clean the valve thoroughly. Use a clean, lint-free cloth to wipe off any dust, oil, or debris from both the inside and outside surfaces. Sometimes, valves may pick up contaminants during transport or storage — removing them helps avoid potential sealing issues or operational friction. If you notice any rust or dirt buildup, use a mild solvent or approved cleaning agent. Remember, a clean valve is easier to test and much safer to operate.
2. Manual Operation Testing
Before connecting any power or air source, it’s always best to start with a manual check. This step verifies that the valve’s internal components move freely and that there’s no mechanical obstruction.
Using the hand lever or gear operator, open and close the valve several times. Move it from fully open to fully closed, and then back again. Observe the motion of the disc (the “butterfly”) — it should rotate smoothly without any sticking or unusual resistance. The valve stem should move steadily, and there should be no grinding noises. Also, make sure the position indicator (if equipped) correctly reflects the valve’s open or closed status.
If you encounter resistance or uneven motion, inspect the seat and disc alignment. Correcting these issues now can prevent serious problems after the valve is energized or pressurized.
3. Electrical Commissioning
If the Butterfly Valve is equipped with an electric actuator, move on to electrical commissioning. Begin by checking the wiring. Ensure that all power connections are tight and correctly matched to the actuator’s rated voltage. Verify proper grounding — this is essential for both safety and performance.
a. No-Load Test
Before the valve is connected to the fluid system, perform a no-load test. This means energizing the actuator without any fluid pressure in the pipeline. Press the open command and observe the actuator and valve movement. The valve should open smoothly, and the motor should run quietly without vibration or abnormal noise. Then press the close command and check the response.
If the valve moves in the opposite direction of the control signal, reverse the wiring of the open/close terminals.
b. Load Test
After the no-load test runs smoothly, proceed with a load test by connecting the valve to the actual pipeline. Turn on the fluid (either water, air, or process medium) and operate the valve as it would be used in real conditions. Observe the valve’s performance: Does it open and close fully? Is the motion stable under pressure? Does the actuator respond within the expected time frame?
Also, monitor for any leaks at the body or seat area. If everything checks out, your valve is ready for service under electrical control.

4. Pneumatic Commissioning
For Butterfly Valves with pneumatic actuators, the testing process is similar but focuses on air supply and control signals.
a. Air Source Inspection
First, confirm that the air supply pressure matches the actuator’s rated range. Too low, and the valve may not open fully; too high, and it could damage the actuator. Make sure all pneumatic tubing is firmly connected, with no air leaks. You can check for leaks using soapy water — bubbles indicate a problem.
b. Manual/Pneumatic Switching
Many Pneumatic Butterfly Valves have both manual and automatic modes. Test the manual override function to ensure it can be engaged and disengaged smoothly. Switching between manual and pneumatic modes should be easy and reliable — this feature is especially important for emergency operations.
c. Pneumatic Action Test
Once the air supply is stable, use the control panel or solenoid valve to operate the Butterfly Valve. Observe the actuator’s motion: the valve should open and close quickly and consistently. Listen for air leaks or erratic hissing noises, which could indicate damaged seals. Finally, confirm that the valve maintains a steady position at different openings and that the disc seats properly when closed.
5. Seal Performance Testing
Proper sealing is essential for maintaining pressure integrity and preventing leakage. Start by testing the valve in the closed position. Apply pressure to one side of the valve (depending on the flow direction) and check the other side for any signs of leakage. For small valves, you can use soapy water; for larger industrial systems, a dedicated leak detection tool is preferred.
If bubbles or moisture appear, the sealing surface may need cleaning or adjustment.
Next, test the valve in the open position. While fully open, observe the flow through the valve. The disc should not obstruct flow excessively, and there should be no noticeable vibration or whistling noise. A well-sealed and well-aligned valve ensures optimal efficiency and energy savings in the system.
6. Adjustment and Regulation Test
Once sealing is confirmed, it’s time to test the valve’s regulation capability — how precisely it controls flow or pressure. Adjust the valve to several intermediate positions (25%, 50%, 75%) and measure the corresponding flow rate. The relationship between valve opening and flow should be consistent and predictable.
If you’re using the valve for process control, verify that the actuator responds proportionally to control signals and that there’s minimal hysteresis or overshoot. Also, monitor vibration and noise — these can indicate instability or improper installation.
7. Remote Control Commissioning
In modern systems, many Butterfly Valves are integrated into remote or automated control setups. To complete the process, check the communication between the valve and the control system. This could involve a PLC, DCS, or other automation software.
Send open, close, and partial open commands from the control room and observe the valve’s response on-site. Ensure the feedback signals (open/close status, position percentage, fault alarms) are transmitted correctly. The valve should react promptly and consistently to remote inputs.
This final check guarantees that your valve is ready for real-world operation within a connected, automated system.

Final Thoughts
Proper installation and commissioning of a Butterfly Valve may seem time-consuming, but every step is vital to ensure long-term reliability. A valve that is inspected, tested, and adjusted carefully at the beginning will deliver smoother operation, longer service life, and fewer maintenance issues down the road.
In short — take the time to do it right. From the first inspection to the final remote test, each detail contributes to performance you can trust.